(あたり判定の準備)
- Carオブジェクトの親を選択
- 「Box collider」を追加する
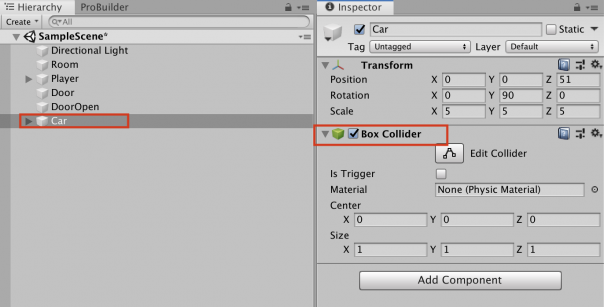
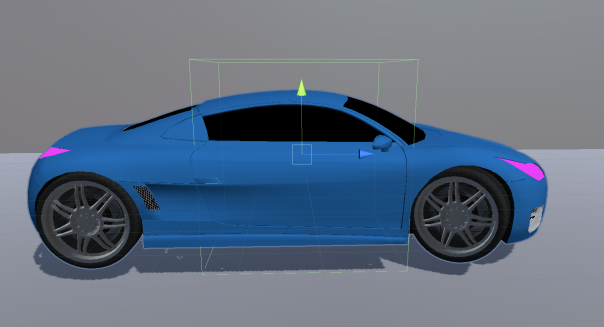
- これがレーザー光線の当たり判定の的になります。
(車を自動回転させる)
- Carオブジェクトに「Rotate」スクリプトを追加
- Rot Yを「10」に変更
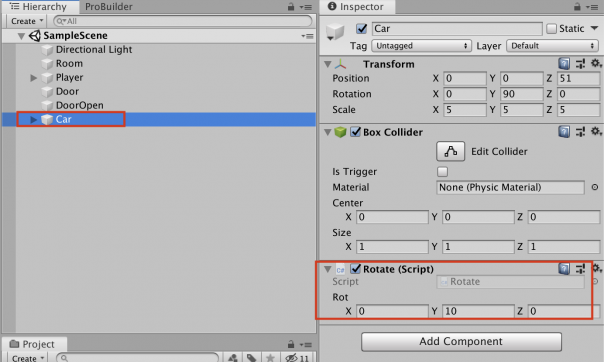
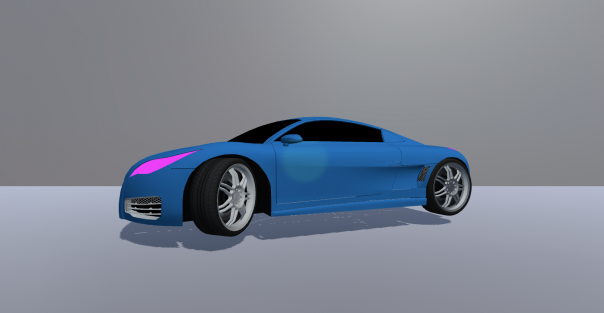
- これでY軸を中心として車がゆっくりと回転します。
(スクリプトの作成)
- 新規にC#スクリプトを作成
- 名前を「RayController」に変更
- 下記のコードを書いてチェック
using System.Collections;
using System.Collections.Generic;
using UnityEngine;

public class RayController : MonoBehaviour
{
    public Transform anchor;
    private float maxDistance = 100;
    private LineRenderer line;

    private bool isRotating = false;
    public AudioClip sound;

    void Start()
    {
        line = GetComponent();
    }

    void Update()
    {
        RaycastHit hit;
        Ray ray = new Ray(anchor.position, anchor.forward);

        // レーザーの起点
        line.SetPosition(0, ray.origin);

        if (Physics.Raycast(ray, out hit, maxDistance))
        {
            // レーザーの終点(オブジェクトにぶつかった場合)
            line.SetPosition(1, hit.point);

            // 変化(回転)
            GameObject target = hit.collider.gameObject;

            if (OVRInput.GetDown(OVRInput.RawButton.A))
            {
                if (target.CompareTag("Car"))
                {
                    if (!isRotating)
                    {
                        AudioSource.PlayClipAtPoint(sound, transform.position);
                        target.GetComponent().enabled = true;
                        isRotating = true;
                    }
                    else
                    {
                        AudioSource.PlayClipAtPoint(sound, transform.position);
                        target.GetComponent().enabled = false;
                        isRotating = false;
                    }
                }
            }
        }
        else
        {
            // レーザーの終点(何にもぶつからなかった場合)
            line.SetPosition(1, ray.origin + (ray.direction * maxDistance));
        }
    }
}
(RayControllerオブジェクトの作成)
- 新規にCreate Emptyオブジェクトを作成
- 名前を「RayController」に変更
- このオブジェクトにスクリプトを追加
- 「Anchor」には「RightHandAnchor」を設定(これで右コントローラからRayが飛びます)
- 「Sound」には効果音を設定
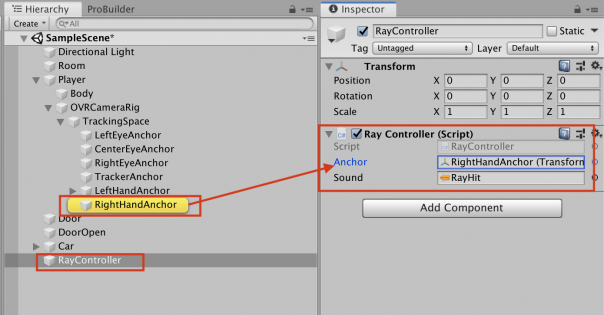
<レーザー光線を可視化する>
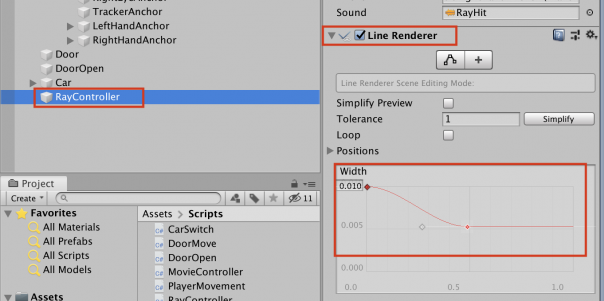
- 「RayController」オブジェクトに「Line Renderer」コンポーネントを追加
- 「Width」を「0.01」に変更(レーザー光線の幅を100分の1にする)
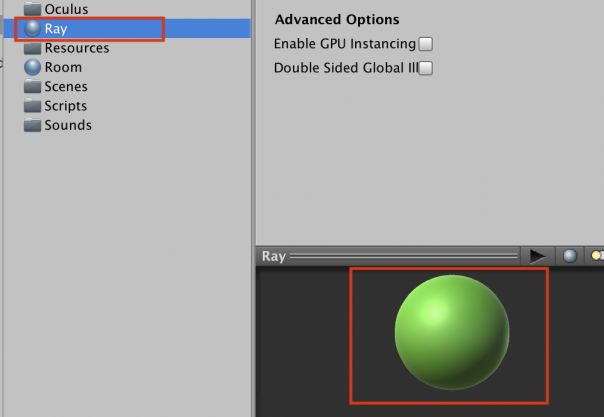
- 新規にMaterialを作成
- 名前を「Ray」に変更
- レーザー光線に使いたい「色」を自由に選択
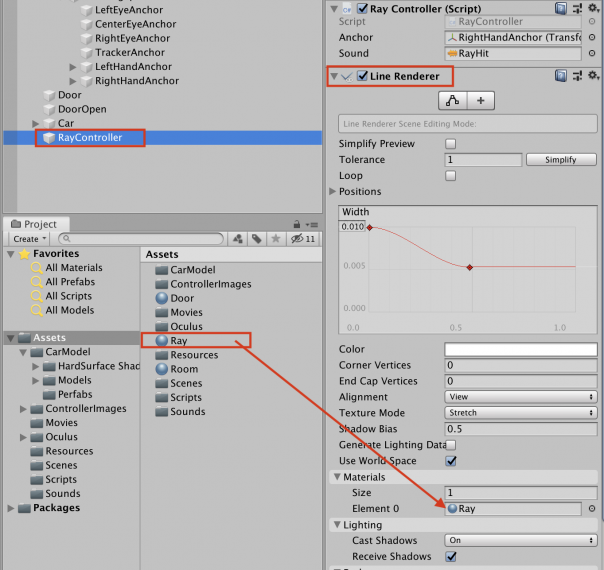
- 「RayController」オブジェクトを選択
- 「Line Renderer」コンポーネントの「Element 0」の空欄に「Ray」マテリアルをドラッグ&ドロップする。
- これでレーザー光線に設定した色が付きます。
(タグの設定)
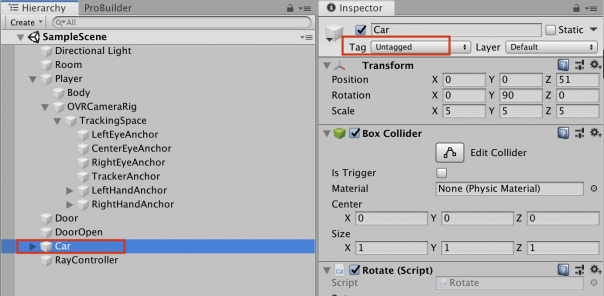
- 「Car」オブジェクトを選択
- 「Untagged」をクリック
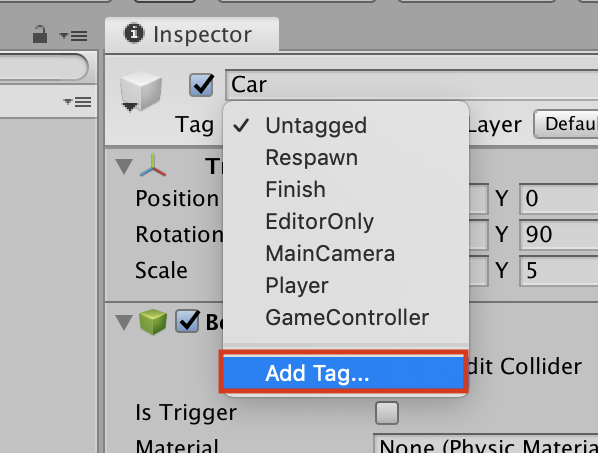
- 「Add Tag」をクリック
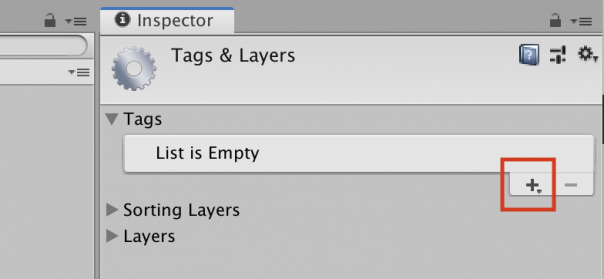
- 「+」をクリック
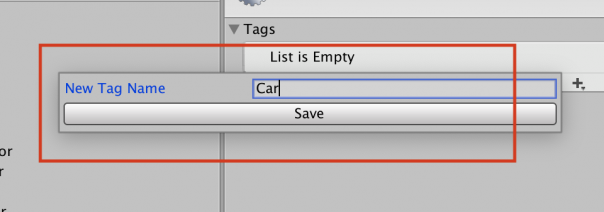
- 「Car」(コードに一言一句合致させる)と書いて「Save」
- これで「Car」というタグが登録されます。
- 「Car」オブジェクトを選択
- 先ほど登録した「Car」を選択
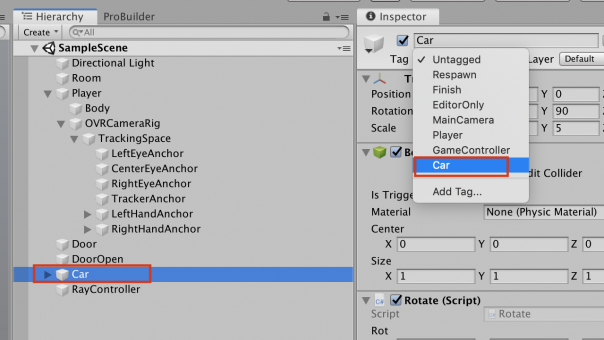
- これでタグの設定が完了です。
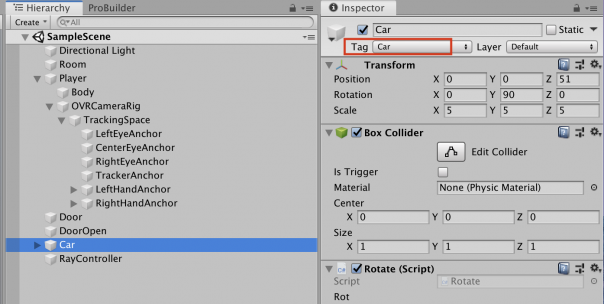
- 設定が完了したら、Oculus Quest2にビルド
- 右手コントローラからレーザー光線が出ていることを確認
- その光線をCarのボディ中央部分にあてて、右コントローラの「Aボタン」をクリック
- Aボタンを押すたびごとに、車の自動回転がOn・Offを繰り返せば成功です。